Thursday, May 30, 2013

Get approved by Google AdSense using Blogger

In our  previous post we have discussed what is Google AdSense and how its works.  Now in this tutorial I am going to share some tips with you to get approved by AdSense using blogger. Every Bloggers and webmasters are dreaming to make money using  their blog, Google AdSense is the grate way to make money with blogs. All you need is approved AdSense account, but its not too easy to get approved by Google AdSense, your blog should follow their policy to get approved by them! And here are few tips to get approved by Google AdSense using blogger blog.

1. Write Original and fresh content


Write your own content and never publish copied content  if you are publishing copied content in your blog then Google AdSense will never approve your application.And remember one thing Google loves fresh and original content. So write fresh and Original content and it will also increase your blog’s traffic.

2. Age of your site


In Google AdSense policy they require 6 month old blog. And well it takes 6 months to optimize your blog, But in real if your content is so good then you need not wait for 6 months you just need to wait for a single month.

3. Add your blog into search engines


You have to add your blog into different search engine like Google , yahoo , Bing so you can get traffic using that search engine and in AdSense its also require to add your site in the different search engine. 

4.Number of posts require to get approved by Google AdSense

You must have published more then 50 posts before applying for Google AdSense approval. And write 100 to 300 words in each posts so you can get traffic from search engine and you will get approved by Google AdSense within a week.

5. Fill the AdSense forum accurately


Don’t write fake address in AdSense signup forum because later it will send you a post to verify your address. Fill address forum correctly and don't use proxy while applying for Google AdSense account. For more information read AdSense policy here.

Now wait for a week for their reply if you have followed above five point then you will get approved by them.

Top 7 firefox add-ons for bloggers and webdeveloper

There are many Firefox add-ons  are available and the add-ons improves the functionality of the browser like if you have played the Need for speed most wanted game then you must know that after purchasing car we have to upgrade the functionality of the car like nitro and many more things and same thing apply here after installing the browser we have to use some add-ons to improve the functionality of the Firefox and there are also some awesome themes are available for  the Firefox browser, we will talk later about the Firefox themes but today we are going to talk about the top 7 add-ons which are helpful to the bloggers and webmaster.
1. FireBug
If you ask the web developer  about the firebug then they will simply say that without the firebug web developing becomes hard and it will also take more time to develop and using the firebug we can customize the web application (client side) to make it better and using the firebug we can easily analysis the  CSS, java script and html easily. Add  firebug into your Firefox.

2. FireFTP
If you are the wordpress blogger then you must have FTP account and the FireFTP is a Firefox client which helps to transfer the files from your machine to the web server and it also allows us to edit the files using the Firefox. FireFTP is really awesome Firefox add ons and you will never need the other application to upload your files to the server ! Add FireFTP.

3. Web Developer
Web developer is  awesome Firefox extension which provides the lots of the tools to monitor the web design and it also includes some other awesome tools, Add web Developer.
4. ColorZilla
ColorZilla is another awesome add-ons which includes color picker, gradient generator and many  colorful goodies and using the color picker you can select the any color from the website and can get the hexadecimal value of that color and the gradient generator helps to get the hexadecimal values of the colors.
5. Html Validator
Html Validator  adds the validation inside the Firefox browser and it helps to find the errors and in the html coding and it shows an error while looking in to the source code in the html. Add html validator.
6. Web rank toolbar
web rank toolbar is an amazing Firefox add-ons which helps us to know the web ranks of the website by just visiting the website so we don't have to manually check the Alexa rank, page rank and the page indexed. web rank toolbar makes it easy and we can know the web ranks of the website by just visiting the website. Add Web rank toolbar.

7. Awesome Screenshot Plus
Awesome Screenshot Plus is a Firefox add-ons which helps to take the snapshot of the web page and Awesome Screenshot Plus can take the full snapshot of the webpage so that's the main benefit of the Awesome Screenshot Plus because the snipping tool cant take the whole snapshot of the webpage.  add Awesome Screenshot Plus.

How To Create Static Page In Blogger

Hurry Google launched new Blogger feature to create static Blogger pages.

Here is the process

1) first sign in to draft.blogger.com

2) go to New Post
3) Select The Edit Pages (See the figure below)


static page blogger, create static blogger pages, blogger tips, blogger tricks


Now write your content and publish it just as you publish the post

select the option where you want to display page list in your blog

now click on save and publish
after publishing click on view to view the created page
copy the links of the page from browser address bar then paste that link where you want

Optimize Your Blog Post Titles for Better SEO

The reason most of the blogger templates aren’t that SEO friendly because templates available in Blogger were designed long ago and haven’t been updated, probably since 2007, since then Google SEO algorithm has changed a lot and as being on blogger you don’t want to be left long away, to keep up with the competition making your Blogger template SEO friendly is very important and so this small SEO related article will help you to leave your competitors behind.

If you are also using a template from Blogger then you need to make some changes on it to fit your needs and also to fit the search engine needs. Normally search engine don’t focus on the markup importantly but it’s a good thing to change it to something user friendly.  What Blogger templates like ‘Simple’, Travel’ etc. have h1 tag as it’s Blog title, which is normal. But the Post title is not okay that all, it is in an h3 tag, for many reasons your blog might not being shown up in the search results and this is on of those reasons.
You won’t find any difficulties with a WordPress theme, as they are freshly published and reviewed by experts but templates in Blogger were made by expert but not freshly launched. Just as the search engines detects an anchor link because of it’s markup then why can’t they see what heading is being used for what area.

Optimize the post title to heading2 in Blogger

Enough about it’s effect, let’s talk about how to make the changes applicable. These easy instruction will give you the easiest way to turn your post title to h2 from h3.
  1. First of all login to your Blogger Dashboard
  2. Go to the Template tab and click on Edit HTML, ignore the warning and proceed.
  3. Check mark the ‘Expand Widget Template’
  4. Use CTRL+F and search for this line
    <h3 class='post-title entry-title' itemprop='name'>
  5. All you have to do is just change the <h3> to <h2>, change of only a number. But we aren’t done yet, remember there’s still an ending/closing tag. You have to change both starting <h3> and ending </h3> tag into the template. In the middle it’s all XML codes that works on the server to serve an HTML page. Changing the closing and starting h3 tag 
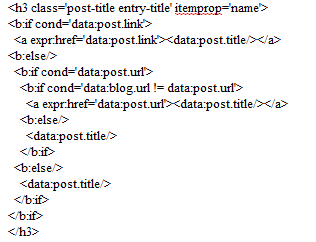
After you turn the starting h3 to h2, do remember to change the ending tag too or it will create difficulties while saving the template.
  6. You will find the tag two times. one is for Desktop Version Template and another is for Mobile version Template. I recommend you to change all h3 that marks as the post title to h2. Searching for <h3 will bring up the codes but as i already said, remember to change corresponding closing tag too.
Yeah that’s it ! It doesn’t only increase visibility and beauty of your blog in search results but also make your blog user friendly. Now stop using h3 for your post title, h3 is only good in the post body for heading. This was not a big change or addition for better SEO in your blog but remember it is how SEO works, there’s no easy and direct way to get to the top of search results, small and effective actions you take regarding your blog makes it a hit on SEO and search engines.
Don’t get worried if your blog don’t do too good in the search results, keep posting and that’s the most important aspect in getting to the top. And this blog is always free to read, check post related to Blogger SEO for some more amazing post and do subscribe for our coming posts.

6 Essential Pinterest Integration Tips for Bloggers

The internet has fallen in love with Pinterest, and what’s not to love? This fast-growing online destination offers a smorgasbord of images to appease the visually-crazed, and is just social enough to make it a great networking tool. Thanks to the combination of these two elements, Pinterest has become an object of interest to bloggers far and wide.

Even if you don’t have a presence on Pinterest, there is a great chance that your audience does. This means you at least need to give it consideration. For those who are ready to go, the following tips will explain how you can effectively integrate Pinterest with your blogging efforts.

1. Add a “Pin It” Button to Your Blog Posts

If you follow trends across the social web at all, you knew it wouldn’t be long before Pinterest came out with a button that connects it to the rest of the world. With the Pin It button, you can provide an easy way for people to share your content on their Pinteret boards. Luckily, adding this button to your post is a simple process.
  • Login to your Pinterest account.
  • Grab the button code from the “Goodies” section.
  • Add the code to the HTML area of your blog post and you’re done!

2. Make Your Posts Pinterst-Friendly

You’ll see a few videos here and there, but the main activity on Pinterest is sharing images. This is why I highly recommend including images in most, if not all of your posts. If you include at least one image, then readers can pin your entire blog post to a board. You definitely want this type of exposure, so when you go to crank out that next post, don’t forget to complement it with a high quality image or two.

3. Use a Pinterest Plugin

If WordPress is your blogging platform of choice, then you may want to consider using a plugin to support your integration efforts. There are quite a few to choose from, with Pinterest Plugin, Pinterest Galleries, and Pinterst Follow Button being some of the most popular options. While there are no official plugins available for Blogger, there are tools you can use to add Pin It and Follow buttons to your blog.

4. Add Boards to Your Blog

Most bloggers focus on getting their blog posts on Pinterest, but you can also reverse this and add boards to your blog. There are a couple of ways to do this. You can use a plugin like Pinterest RSS Widget, or code the functionality into your theme, which of course, requires some programming knowledge. You could also use a service like IFTTT, a tool that automates the process for blogs using Pinterest-inspired themes. Keep in mind that the aforementioned methods are all specific to WordPress.

5. Network with Fellow Pinners

Pinterest may not be the conventional social network, but it falls in the same category as the rest of them nonetheless. You can juice this site for its rich networking capabilities by connecting with other users. Comment on their pins. Like them. Repin them. This is the same approach you want to take when marketing on any social network. Spread the love, steer clear of the spammy advertising tactics, and rubbing shoulders with the Pinterest faithful could send some nice traffic to your blog.

6. Track Your Efforts

So you’ve made the move to integrate Pinterest with your blogging efforts. How’s everything going? Hopefully you have a good tracking system that will allow you to find out. When combing over your reports, you mainly want to find out who is coming in from Pinterest, and what they are doing once they reach your blog. Whether it’s JetPack for WordPress or the Blogger-friendly Google Analytics, there are several tools that can provide these insights.

Market in the Moment

How long will the Pinterest craze last? It’s hard to say. A site that is popular one year could be on its way out the door the next. What’s important for now is understanding that the hype behind this thing is very real. Consumers are all in and some of the brands that hopped on the bandwagon early are seeing good results. If you start working on integrating Pinterest with your blog now, you will be in line to see some gains regardless of what happens in the future.
How are you mixing Pinterest with your efforts? Anything that might work for the rest of us?
Share the knowledge in a comment?

Awesome Tips To Resize And Edit Images On Blogger & Picasa

I already wrote a tutorial on Hosting Images Freely on Blogger with unlimited bandwidth. If you are using Blogger then all images you upload on your blog will be storeed in Picasa. Picasa is a Free Google Service. What does this mean ? when you create a blog, Picasa automatically create an Album for your blog.This album will have the same name as your blog. And all your hosted images are served with Google CDN.

Well, You have uploaded an Image to your Blog, Now you want to Resize it Down (Scale it Down). What should you do? You could :
  • Edit the Local Image in an Image Editor
  • Resize the Image and Save in your Computer
  • Upload again to Blogger
But You are doing a lenthy process and you will have to upload the image to your blog again.
You could use the inbuilt Image Resizing feature in Blogger (Picasa) ?.
In this article you will learn utilizing the In-built Image Resizing Feature with some Additional tips.
Here, I have a sample Image with the dimensions 2000px x 2000px Here is the Direct link which is hosted on my Server.
Here I uploaded the image to Blogger and the Blogger Hosted image URL is
https://blogger.googleusercontent.com/img/b/R29vZ2xl/AVvXsEi_Yt2QltWAIiJzV-6xkdrVbFAOVlptKUrB97YAb7fwFYe0HWjRwEcIgMkqAJJ31ZwDQs022_o8JXQZn3yYcGrzoxilZQPrxBjzKfTvTKcgQ8axBSH1OmvSYGg43ipq6KWEDnL7e4IBrY4E/s1600/sample-2000x2000.jpg
In the this url, observe the path before file name. which is Image size s1600 and it is the default blogger dimension.
What does this means, the image dimensions is 1600 on largest side.

What if the Image Widths and Heights are various ?

The first sample image is 2000 pxiels wide on both sides. If i uploaded the image to blogger which is resized to 1600 pixels on both sides. Check the Below Image.
https://blogger.googleusercontent.com/img/b/R29vZ2xl/AVvXsEi_Yt2QltWAIiJzV-6xkdrVbFAOVlptKUrB97YAb7fwFYe0HWjRwEcIgMkqAJJ31ZwDQs022_o8JXQZn3yYcGrzoxilZQPrxBjzKfTvTKcgQ8axBSH1OmvSYGg43ipq6KWEDnL7e4IBrY4E/s1600/sample-2000x2000.jpg
Here another Sample image which dimensions are 2000px x 1200px Here is the Direct Link and is hosted on my Server.
The Blogger Hosted Image is
https://blogger.googleusercontent.com/img/b/R29vZ2xl/AVvXsEhkjyFXC7gHqolL76eD26GSqD3jQNqTU17xAw1PQVSXE8YCuxafHHOXrA1NGHgfYN_YOUhKFdlSvppU5v572HOqliV_hhmw6z6-st-5gxSnvNkE-E6Rj558c7ZlXhyphenhyphennm4-YbPcQwHLl7kPH/s1600/sample-2000x1200.jpg
the above image width is 1600 and height is adjusted to corresponding to Original Image size ratio.
Another Example of Sample image which dimensions are 1200px x 2000px Here is the Direct Link and is hosted on my Server.
The Blogger Hosted Image is
https://blogger.googleusercontent.com/img/b/R29vZ2xl/AVvXsEi_g_JCYV3-4QSxKCWvUTe11_t_3omLitHGxpRCnmnTVJeds9QbsTIrk2ktaKaLPmwIfao840AsGJVe7yyK1V7sd6WrY9329_xyFfELuVn9DBe1l0_ATMeBrvAw-bp1tIb5bdhkCekc8syY/s1600/sample-1200x2000.jpg
the above image height is 1600 and width is adjusted to corresponding to Original Image size ratio.

How to Resize my own Images?

Upload the image to Blogger and get the Direct image link. If you want 250px width image, change s1600 to s250 (leading s is important and use any width you want.)
https://blogger.googleusercontent.com/img/b/R29vZ2xl/AVvXsEhkjyFXC7gHqolL76eD26GSqD3jQNqTU17xAw1PQVSXE8YCuxafHHOXrA1NGHgfYN_YOUhKFdlSvppU5v572HOqliV_hhmw6z6-st-5gxSnvNkE-E6Rj558c7ZlXhyphenhyphennm4-YbPcQwHLl7kPH/s250/sample-2000x1200.jpg
And now the image size is 250px width and hight is corresponding ratio to original image.

What about Image Cropping ?

Picasa is also offering Image Cropping. which means, if you give a definitive image size, it will automatically cut the extra image on either sides and produce a perfect square image.

How to Crop image?

After changing the Image size just add the -c at end of image size. s200-c like so. take a look at image preview.
https://blogger.googleusercontent.com/img/b/R29vZ2xl/AVvXsEhkjyFXC7gHqolL76eD26GSqD3jQNqTU17xAw1PQVSXE8YCuxafHHOXrA1NGHgfYN_YOUhKFdlSvppU5v572HOqliV_hhmw6z6-st-5gxSnvNkE-E6Rj558c7ZlXhyphenhyphennm4-YbPcQwHLl7kPH/s100-c/sample-2000x1200.jpg

Is it Great? Where should i use this?

I use this tricks all the time.
For example the image is very large. if you want to place the image in your post. but your site loads very slow.
so use the crop trick. take a crop image and place in your post and link the image to Original Image.
<a href="https://blogger.googleusercontent.com/img/b/R29vZ2xl/AVvXsEhkjyFXC7gHqolL76eD26GSqD3jQNqTU17xAw1PQVSXE8YCuxafHHOXrA1NGHgfYN_YOUhKFdlSvppU5v572HOqliV_hhmw6z6-st-5gxSnvNkE-E6Rj558c7ZlXhyphenhyphennm4-YbPcQwHLl7kPH/s1600/sample-2000x1200.jpg">
    <img src="" alt="https://blogger.googleusercontent.com/img/b/R29vZ2xl/AVvXsEhkjyFXC7gHqolL76eD26GSqD3jQNqTU17xAw1PQVSXE8YCuxafHHOXrA1NGHgfYN_YOUhKFdlSvppU5v572HOqliV_hhmw6z6-st-5gxSnvNkE-E6Rj558c7ZlXhyphenhyphennm4-YbPcQwHLl7kPH/s100-c/sample-2000x1200.jpg"/>
</a>

Wednesday, May 29, 2013

Best Google SEO Tips And Tricks 2013 For blog Traffic

Best Google SEO Tips And Tricks 2013 For blog Traffic:

Every bloggers will like to show their contents at top 10 positions in Google search engine to increase the blog ranking and traffic. Generally Google increases the traffic to your blog by visits that come from a keyword search on its own search engine. So website and blog owners who are very interested in increasing the audiences, traffic and rankings have to focus on their content to get in Google keyword searches.

There are many Google search engine tips and tricks available in the internet which helps to increase your Google search rankings. Many bloggers and website owners are try to get Google organic traffic by paying for links to their sites and other activities. it will help to boost their search rankings for short-term only (i.e) until the Google recognizes that these bloggers are violating their terms and conditions. Google permanently remove those blogs from its search engine.

A Best way to increase blog traffic from Google is organically. If we want to build a great blog then we have to focus on readers who want to read, talk about, and share our blog. it helps our search engine rankings to grow naturally. This type of growth is a powerful thing and increases the traffic that will never lose for a very long time.

In this article, I am going to discuss about how to boost our organic Google traffic, so you can get started right now.

1. Write Quality Content for Readers, Not for Search Engines:

This is the major mistake done by many new blogger. So try to understand that Google and other search engines weigh when ranking search results is the quality of websites and blogs. That means your article must be related to your blog's niche, so your readers can continuously gets the fresh and useful content to read. In that mean time, Google will identify your blog as a source for specific content, which will helps to improve your search rankings and Google traffic.

2. Making Readers to Stick Around on Your Blog:

We have to focus on our reader to stay in our blog for long Because Google also considers that how long the Readers are sticking on your blog based on its search engine algorithm. When Readers visit multiple pages and read posts on your blog for long time in a single visit, that send message to Google that your content is more relevant and interesting to readers. Keep this in mind and create a user-friendly navigation that helps visitors to reach the related content, Latest topics, and any other articles on your that makes them interesting to keep them to stick for a bit longer.

3. Ensuring the Readers Experience is Always Good:

Don't forget that the Readers experience on your blog will always plays an important role in improving Google organic traffic. Remember, since Google considers that how long the Readers are sticking on your blog based on its search engine algorithm, Same time a bad user experience that keeps visitors away from the blog could hurt your Google organic traffic. Therefore, make sure you have reliable web hosting, good navigation links, Remove the clutter from your pages, and make links to more relevant and interesting content easy to find.

Google also consider about your website page load speed and ranks the website with the fast loading sites higher than the slow loading websites. So make sure to review about host providing services before you purchasing it.

4. Build Internal Links But Don't take advantage of it:

Internal links within your blog posts will makes readers to visit multiple pages. so the internal links should help to reach your best content and related contents will help to increase your Google traffic. By Increasing attention to your best and most useful content will increases more value to your blog and make readers to read additional posts, share posts with their friends through social networks and Stimulate them to visit your blog again.

All of these activities help to increase Google search traffic, so include internal links in your blog posts whenever it needs. But careful  stuffing internal links into your posts will make you site as a spam. That could draw negative attention and penalties from Google.

5. Avoid Short-Term SEO Tricks:

As i told In first topic trying to gets some incoming links from from paid services to increase your blog's Ranking in Google's Search algorithm, which should increase Google traffic to your blog. However, this short-term tactics will not work for long time. So Avoid those "short-term tactics".

Use Ethical and white hat search engine optimization tactics to improve your efforts to write a quality contents that your niche audience wants to read and share. it's the most valuable thing you can create to increase sustainable, organic Google traffic and grow your blog.
I Hope This Article will be helpful to increase your Google organic traffic. If have any questions regardint to this. please feel free to ask via Comments.
 
Tags: Google seo tips and tricks 2013, top seo tips, search engine optimization tips 2013, how does seo work with Google, how to do search engine optimization 2013, seo recommendations 2013, how to do search engine optimization in my website,